Hi There,
Another update for today. Enjoy !
That’s all for now.
Take care.
Pascal

Hi There,
Another update for today. Enjoy !
That’s all for now.
Take care.
Pascal
Hi There,
Another update tonight. Enjoy !
That’s all for now.
Take care.
Pascal
Hi There,
Another update tonight. Enjoy !
That’s all for now.
Take care.
Pascal
Hi There,
Just to let you know that I am starting my game project all over again, from scratch, with Unity this time.
Here is a simple animation to show how it will look like.
That’s all for now.
Take care.
Pascal
Hi there,
It’s been a while…
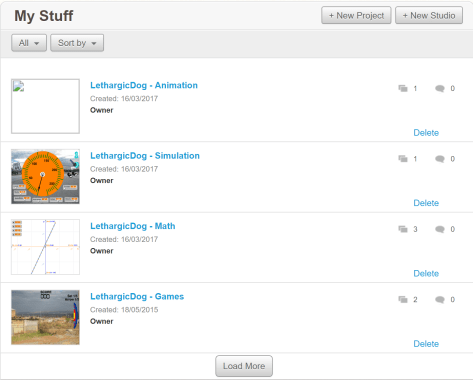
Today I am setting up a brand new organization for my Scratch stuff. I have decided to split my account in order to manage four independent studios. The main reason for that is to keep it tidy and organized. Now you have 4 studios. One studio for Video Games (Pong and other basics) , another one for Animation (kind of cartoons if you wish), the third one is about Mathematics and last but not least for Simulators (Dashboards, Mechanics…). I will probably create more categories someday, but that’s enough for the moment as I haven’t shared that many projects yet.
I have decided to make these four “collections” in order to match my global strategy that consists of several centers of interests, different topics, that people would follow in particular, without having to read all my stuff if they don’t want to. This is already the case for this very blog where you can choose English or French content or search by categories and tags. Same principle for my Google Plus account which has up to 15 collections (including “3D Game Dev”, “Creative Content”, “Education”, “Inspirational”, “Shopping List”…) when my Instagram is more about my travels, adventures and projects and my Twitter is related to more profound stuff (and some jokes when I am in the right mood). My future YouTube account will probably follow the same path, but no need to hurry for that one, as I have uploaded only one video so far.
Another reason why I needed several categories is for the “Animation” part. This one will have a specific role in the creation of my videos. I will use it either for scripting/editing, or for character animation, and maybe sound and musics as well.
That’s it for now. Please follow me on my networks, share, comment and like. (Any language will be fine for comments, but preferably English of French)
For direct access to my Scratch Account, click here.
Take Care,
Pascal
Hi There,
This post is about a tutorial that I have found on YouTube on how to build a roof with Lego. The author of this great tutorial is JAYSTEPHER. I highly recommend you to subscribe to his channel, as he is providing great advice on building amazing Lego stuff.

His tutorial consist of showing us how to build a roof with actual (real) lego bricks, but the purpose of my post today is to suggest that you can build that roof with Lego Digital Designer instead. (LDD is available for free download here).
FYI, it seems that Lego will not provide any further updates for LDD, but the latest version (4.3) is still amazing.
The way I have proceeded is quite simple and there is nothing unusual here. I just ran both LDD and JAYSTEPHER YouTube Video Tutorial (Available here), and I followed his construction step by step, pausing his 17 mn video as often as needed in order not to forget any details. After an hour or two (took much longer that necessary because I took snapshots of my work in progress in order to make this very post, and I tried to compare his part list – available in his video comments – to mine – available down below and also with my own building instructions, ZIP file available for download here)
If you’re interested to try to build it by yourself, I highly suggest to open both JAYSTEPHER Video, this very post, and my building instructions, so then you have multiple source of information to reach your goal. This might be particularly useful because the author of the tutorial had to move some pieces of the larger window, and as he did not record the video again just for that, my own building instruction might be helpful there. Or you might just be interested it the Parts List below:


For once I have provided a more intricate work here, combining a tutorial, many screenshots, and the building instructions available for download from my google drive, so I would be particularly glad if some of you guys comment this post. Would it be for questions, or to help me improve my writing (as you probably have noticed I am not native English), or even for other remarks, on how it has been useful to you or not, and if you are interested in some more content of that kind)
That’s all for now, I really hope you enjoyed this post as much as I did preparing it. Feel free to share, subscribe, like and comment, and for even more content about Lego, Game Design, 3D and other fun stuff, check my Google Plus account here)
Take Care!
Pascal
Hi there!
Another one around this “Pong” project that I am working on for a little while now.
My students using SketchUp 2016 rather than Blender, I thought it would have been a good idea to do the Pong pitch with this app as well. So here we are.

Not much more to say about it. If you’d want to review the other ones though, here are the links:
– With Lego Digital Designer
– With Blender
And dont hesitate to rate, like, comment, share, and subscribe)
Take care!
Pascal
Hi there,
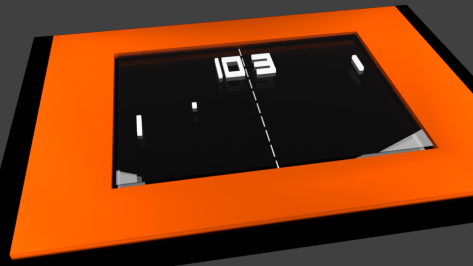
Another way to illustrate our work with Pong would be with Lego Digital Designer.
Here is what you can get with very little effort:
 This was made with Lego Digital Designer 4.3 that you can get for free here.
I have used the Extended bricks library (The ones that are red), in order to be able to select the black color later on (for the larger plates).
The game is surrounded by an orange layer the same way that I did previously with Blender(You can check this out here).
Notice that I have chosen flat tiles for the pads, the ball and the orange rectangle.
By the way, this model cannot actually be built because nothing comes to stick the large black plates together. The purpose was only to make a png image out of it.
That’s all for now, please comment, like, subscribe, share…)
Take Care!
Hi there,
Another short article about my work with Blender.
This time I have tried to do things on my own (without the help of any tutorial), and as expected the result is not as awesome as the two previous projects (here and there), but still, not to bad for a restart with the tool.
As I am working on several projects around Pong Original (with Lego Designer, SketchUp, Scratch..), I thought it would have been great to try to do something with Blender as well.
The plan was also to get my students inspired, so they can finish and deliver something by the end of spring holidays.
Regarding my own stuff, here is how it looks like:
Inside Blender:

Render:
The challenge was with the lights and materials here. I am not 100% happy with the outcome but I didn’t want to spend the whole day on it, so here it is.
As always, feel free to comment, subscribe, like, share…
Take Care.
Pascal
Hi there!
Still having lots of fun with blender here. Just wondering why I have left this amazing app for so long…
Step 2 of my “back on track” journey (step 1 here), I have decided to follow another tutorial for drawing an alarm clock this time. Here is below one screenshot when I was half way through it:

What makes me feel rather good is the fact that I am remembering how to use Blender, quickly and easily, and I should pretty soon be able to make my own models for my Unity games.
This Blender app is a bit intimidating at first, but when you finally see the results that you can get, it is really rewarding:

If you compare this final image to the Tutor4u tutorial, you will probably notice that I have customized it a little. The PNG image for the numbers is done with a different font, and I have rotated the hand to show 11:11, which has btw been obtained by rotating the hours hand by 30 degrees anticlockwise and the minutes hand by 66 degrees clockwise.
FYI, I have used Inkscape 0.91 for the texture image and the “Broadway” font. Also Blender is version 2.77 and I have selected “Cycles Render”.
Once again thank you so much to Tutor4u, for the tutorial that I have used. I would recommend his channel and you can find part 1 of this very tutorial right here.
(Please Comment, Share, Subscribe and Like…)
Take Care.
Pascal


You must be logged in to post a comment.